Search

Filling cells with random numbers in libreoffice

While working with data in a spread sheet, we might have the need of filling up certain cells with random numbers with in a given range. We might enter these numbers ourselves if only a few are required, but if a large number of random numbers are needed then it will be tiresome and time consuming to do ti manually.

Libreoffice provides a shortcut to fill the cells with random numbers of what ever range we need. To fill the cells with random numbers, follow the procedure below.

Open libreoffice calculator/spreadsheet and select the range of cells in which random numbers have to be filled.

 photo random_select_range.png

Now click on Edit->fill->random numbers

 photo random_edit_menu.png

It will prompt a menu as shown below.

 photo random_number_gen.png

In the menu

Cell range: Is the range of cells that has been selected for filling with random numbers
Distribution: In case we are specific about the distribution of random numbers we can select one of the distributions. If we want only integers we can select Uniform integers
Seed: All random number generators us a seed value to generate random numbers, if we are specific about certain seed we can specify the same by selecting the check box and entering the seed value. else we can leave the default value.
Maximum and minimum: The range between which we want the random numbers to lie.

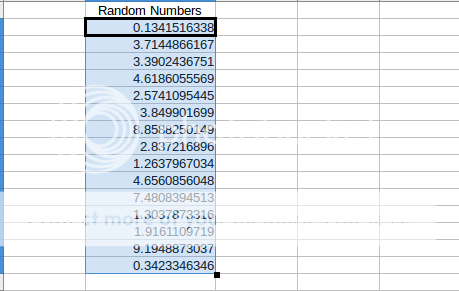
Afte entering the values as we need click on ok, and the range selected will be filled with the random numbers of hte given range.

 photo random_decimal_truncated.png

In case we want the random number to be in decimal, by default the random number generator will generate numbers with 8 decimal places.

 photo random_number_generated.png

If we do not need such high precision, we can truncate the value to one or two decimal places by right clicking on the cells and selecting format cells.

 photo random_format_cells.png

Select the numbers tab

 photo random_decimal.png

Select category as number and then choose the number of decimal places required and click on ok.

 photo random_2_decimal.png


libreoffice paste only numbers not formula

While working with libreoffice spread sheets, we often use formulas to update various fields. For example we might have a column having the marks scored by students of a class in various subjects as shown below.

 photo average_sheet.png

We can use the formula average to find the average marks scored by the class as shown below.

 photo average_formula.png

Now if we want to copy the averages from this sheet to another sheet a simple copy paste will not work. A simple copy paste will result in the pasted value being as below.

 photo normal_paste.png

This is because when we do a simple copy paste we care copying the fomula not the value that has bee derived from the formula. To paste the value alone, ignoring the actual formula, in the new sheet click on Eidt-> paste special

 photo edit_paste_special.png

A menu as shown below will be displayed.

 photo paste_special_menu.png

From this menu select what ever that needs to be pasted.Uncheck the paste all option and select that we need to paste numbers and text and remove the check next to the fomula option. Now click Ok and we will see that only the numbers of the average value will get pasted as shown below.

 photo only_numbers_pasted.png


Hot corners fot configuring cinamon desktop

In cinnamon GUI, we can configure the corners of our desktop to behave the way we want. That is when we move the cursor to any of the four corners of the desktop we can make the system behave in a specific way. For example every time we move the cursor to left corner all windows get minimized and the desktop is shown, or all the active windows are popped up on the screen.

This is possible by use of the Hot corners application.

In cinnamon this is available under preferences as shown below.

 photo in_menu.png

Once we lauch the hot corners application we will be presented with a window as shown below.

 photo hot_corner_window.png

We can see there are four corners highlighted and for each corner there is separate set of activation options. for example let us say we want to view the desktop every time we move the mouse the left top corner of the desktop. In the left top corner of the hot corner window click on the menu and select the option "Show the desktop" .

 photo hot_corner_options.png

There are two check boxes provided below, First one is to show an icon on the desktop which when clicked will behave as we have decided. The second checkbox when enabled will enable the selected behavior when we hover the mouse at the corner.

We can also choose to run a specific command when we move the mouse to a corner by choosing the "Run a command" option from the menu and then entering the command in the text box provided. This can be used for applications that we use very often, like libreoffice or firefox etc.


Creating superscript and subscript font in Libreoffice

We need to use the following steps to turn a text to a superscript or subscript in libreoffice

Let us say we have the text Super Script 4, and we want to transfer the number 4 into a super script.

 photo super_script_1.png

First select the text that has to be made into super script and then right click as shown below.

 photo super_script_2.png

Select the option "character" which will pop out a menu with multiple tabs as shown below.

 photo super_script_3.png

Select the tab titled "position". In this tab under the heading "position" we will notice three options


To turn the text into superscript select the superscript option and click on OK.

To turn the text to subscript select subscript.

If we select the text will automatically turn into superscript as shown below.

By default the text gets raised/lowered by 33%, if we want to change the amount of raising/lowering of the text,then go back to the menu where we selected the superscript/subscript.

On right side to the options of position of the text we will notice options as shown below.

 photo super_script_5.png

Uncheck the option "Automatic" and then enter the percentage of raise in the text box provided next to "Raise/lower by" to change the amount of raise. The following is after changing the amount of raise to 80%


Creating cylic redundancy check number for a file in linux

CRC stands for Cylic Redudancy Check.

According to wikipedia

A cyclic redundancy check (CRC) is an error-detecting code commonly used in digital networks and storage devices to detect accidental changes to raw data. Blocks of data entering these systems get a short check value attached, based on the remainder of a polynomial division of their contents. On retrieval the calculation is repeated, and corrective action can be taken against presumed data corruption if the check values do not match.

ref: http://en.wikipedia.org/wiki/Cyclic_redundancy_check

So CRC is used when we want to ensure that the data being transmitted is error free. Now there are a number of methods to calculate the CRC and different types of CRC which ware listed out in the above mentioned CRC link of wikipedia.

Linux provides a simple command to find the CRC with out bothering about the mathematical details of the CRC calculation.

The command to calculate CRC of a text file is CRC32

The syntax is simple


Let us say we have a file called hello with the contents


Please note that as many times as you run the command, the CRC32 will remain the same as long as there is no change in the file. Note that even a space in the file change the CRC32.

colrm to remove columns from a text file

Organizing data is columns is a very common occurrence and need for manipulation these columns is needed often. colrm is a command that helps us remove a set of columns easily from a text file.

colrm takes two optional arguments


start: The first column that has to be removed stop: The last column that has to be removed.
The command treats every character in a row as a column. If we specify only the start column, the characters starting from 'start' column number till the end.
For example if we have the following file
data:


The file has data in three columns. One set of numbers, one set of blank characters and one set of alphabets. To remove the alphabets, which is the third and last column we need to specify only the column number from which to begin as the alphabets are the last column.


If we want to remove the column from between, like the column of numbers which is the first column we can pass the starting and ending column numbers as shown below.


We can see that only the first and second columns are removed and the other columns are displayed.

Rendering a calendar in gimp

To create a calendar from any image we want we need to be able to render the dates with the days on the image and make it appear seemeless. This can be achieved using gimp and its calendar plugin. The calendar plugin can be downloaded from


Once you have downloaded the file, place it in the file


(the above path could be different if your gimp version is different)

Now launch gimp and open the image on which we want the calendar by clicking on


 photo 1.png

To render the calendar click on

 photo 2.png

This should launch a window with options for the calendar as shown below.

 photo 3.png

The options available are

Language: We can choose from the different languages in the pull down menu
Month: The month for which we want the calendar
Year: Year for which we want the calendar
Day Format: The format in which the days of the week should be displayed. We can choose from the three available formats.
Layout: The layuot of the dates in the calndar. There are four differrent layout available.
Text and number fonts.
font size
Border Width: Width of the borders of the cells in which numbers will be placed.
Border Color: Color of the border of the cells.
Date Position: Position of the numbers in the cells.

The color of the numbers will be the same as the color that has been set in gimp.

Click on OK and let the script create the calendar. Once the script finishes, we should have an image as shown below.

 photo 4.png

We can see that we have two extra layers above our image. These are for the borders and the dates. We can resize the calendar on the image by first merging these two layers into one.

 photo 6.png

Then resizing the layer to the size that we wanted.

 photo 7.png

To save the image with the calendar click on


Enter the file name and choose the filetype to export to.

Final image with out resize of calendar

 photo 5.png

With resize

 photo 8.png

More information at

http://registry.gimp.org/node/20193